Simplifying Thin Client Management with VisuNet Control Center
Content of This Article
Simplifying Thin Client Management with VisuNet Control Center
2020 has brought many changes to the way we operate and perform our day-to-day tasks. In the automation world, facilities are limiting the number of people they have on-site to essential personnel only. All other employees are working remotely. In some roles, this is unproblematic and easy to manage, but in others it is tedious and many responsibilities cannot be performed.
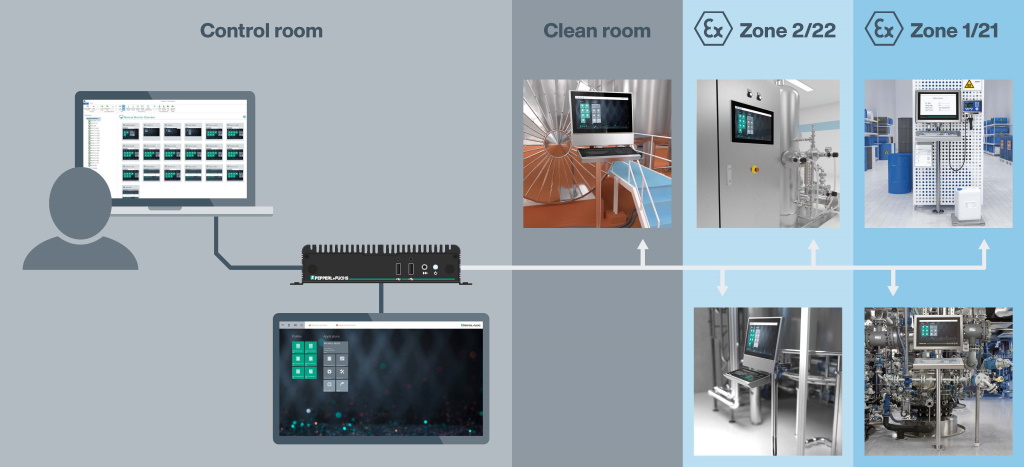
For automation sites that have implemented a Pepperl+Fuchs VisuNet RM Shell thin-client-based architecture for their HMI systems, VisuNet Control Center can be used to make life more manageable inside and outside of the facility. The software allows users to easily communicate, manage, and interface with their entire RM Shell-based thin client installation—whether it consists of desktop thin clients in non-hazardous areas or workstation thin clients in Division 1 areas.
How to Get Started
First, you must download and install VisuNet Control Center onto a laptop or server. The PC has to be on the same Ethernet network / subnet as the thin clients in the facility. Once VisuNet Control Center is appropriately installed and placed on the network, you will be only minutes away from full visibility of your HMI topology and management of your RM Shell thin client installation.

Any Pepperl+Fuchs thin client running software RM Shell 4 or 5 can be used with VisuNet Control Center, once the thin client is properly licensed. To find all your devices within the network, simply press the button and scan the network. VisuNet Control Center will then seek out any thin client running RM Shell and add it to the navigation list. Alternatively, if you have a listing of the IP address or names of the thin clients, they can be added manually.
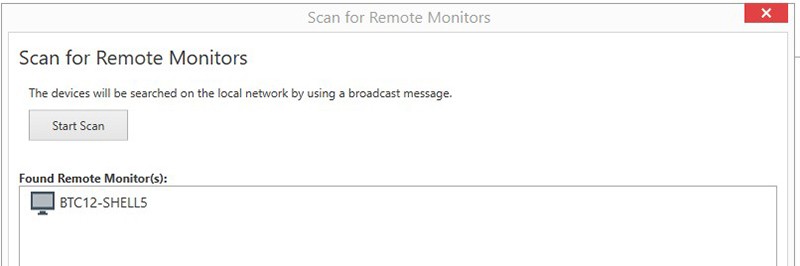
"Start Scan" button to search the network for all devices.
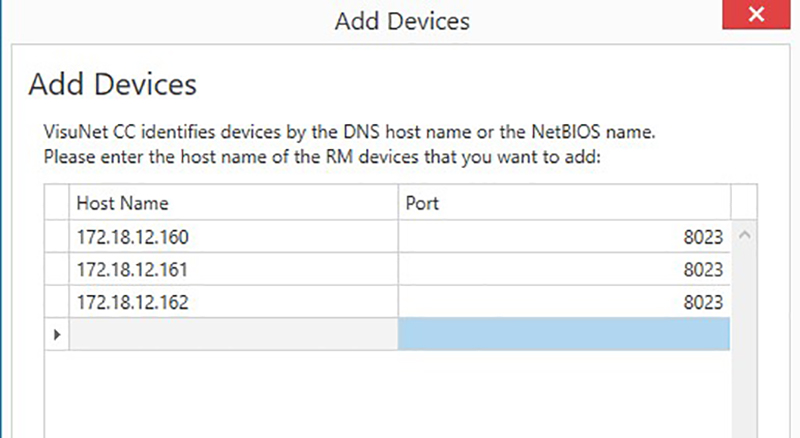
Add devices to the navigation list
Managing Your Devices
Once you have added all the thin clients, they will appear in the navigation menu. You can also quickly create groups for the thin clients to segregate them or organize them in a way that makes sense for your installation and facility. Simply click the “Create Group” button, name the group, and drag and drop the HMI into it.
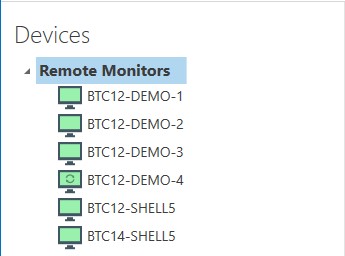
Added thin clients are displayed in the navigation menu.
“Tile View” is the first screen that you see by default when using VisuNet Control Center. It gives an overview of all thin clients using thumbnails. These are more or less real-time snapshots of what each of the thin client screens looks like—it only lags by a second or two. This gives you a great overview of which thin clients are performing which tasks, which units may be nonoperational, and which units are idle.
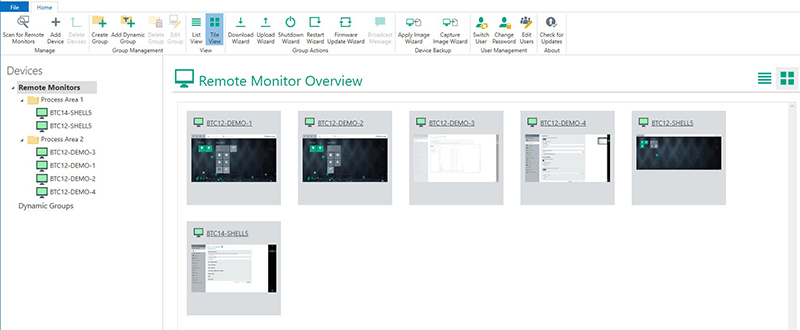
The tile view is set by default.
Alternatively, the “List View” provides a structured textual overview of all devices, including name, description, group, status, IP address, RM Shell version, and serial number.
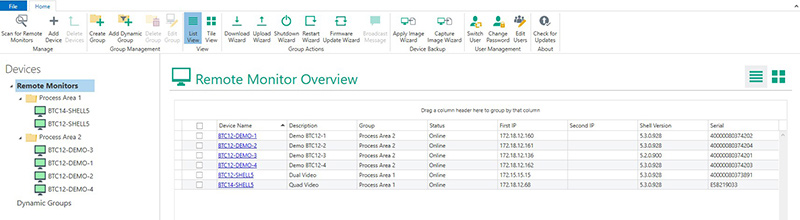
Optional list view
Clicking any of the thin clients in either the List View, Tile View, or the topology tree on the left side will bring up the specific page for that thin client. Here, you have full access to the thin client.
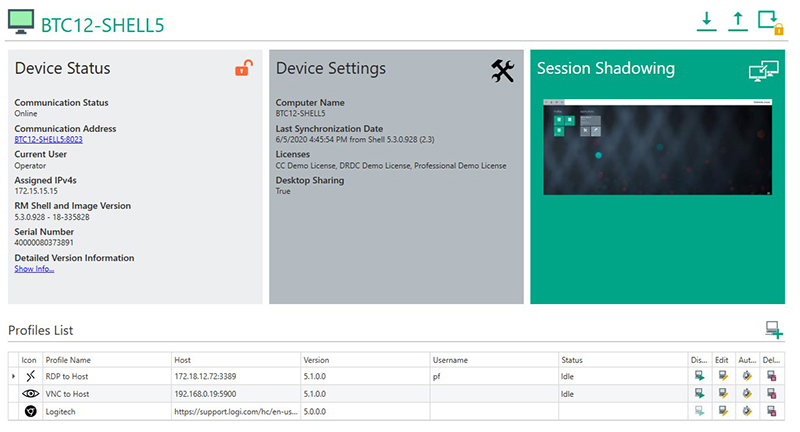
The light gray box on the left side gives you general device status and information. The darker gray box in the middle allows for complete customization and modification of the thin client settings. The green box on the right side enables session shadowing and control. Lastly, the Profiles List on the bottom allows you to quickly create, delete, modify, and connect/disconnect remote protocol connections on the thin clients.
When shadowing a session, a new window will open up on your computer. This will give you a full-screen view of the exact screen the thin client is on. There are buttons at the top of this page that allow you to disable the keyboard / mouse / touch screen inputs, take full control of the thin client, and operate it remotely. Session shadowing is beneficial when it is not possible to interact with the thin client directly. It offers the freedom to operate remote, whether you are in your office, in the control room, off-site, or at home.
Session shadowing enables full access to the thin client's screen.
Additional Tools and Features
Additional “Wizards” guide you step by step with detailed information through all kind of processes to improve the user experience. The Firmware Update Wizard for example allows you to quickly and easily update RM Shell or implement Microsoft® security patches across any number of thin clients in your installation. With just a few mouse clicks, the wizard will guide you through the process and initiate the update. Depending on the size of the firmware update or patch, all selected thin clients can be updated in just a few minutes—no need to update the units one by one or directly at the thin client workstation.
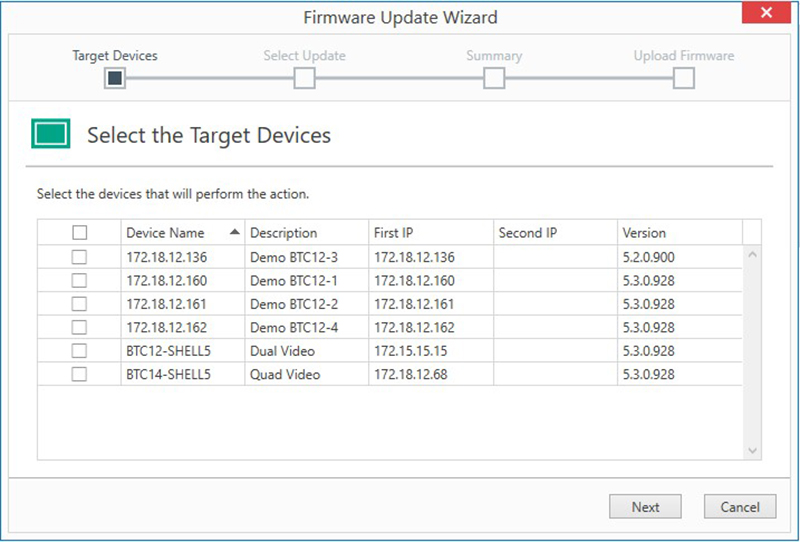
All selected thin clients can be updated simultaneously using the Firmware Update Wizard.
A Clone Wizard allows you to create a clone of a specific thin client unit. All specific settings like profiles, desktop sharing, and dialog filter installations can be easily copied from one thin client and pasted onto multiple other devices. This feature can be used upon initial commissioning or when adding new thin clients to a preexisting installation. You can save an immense amount of time and create one master thin client with all the appropriate settings. In a matter of seconds, those settings can be copied over to the other thin clients being installed.
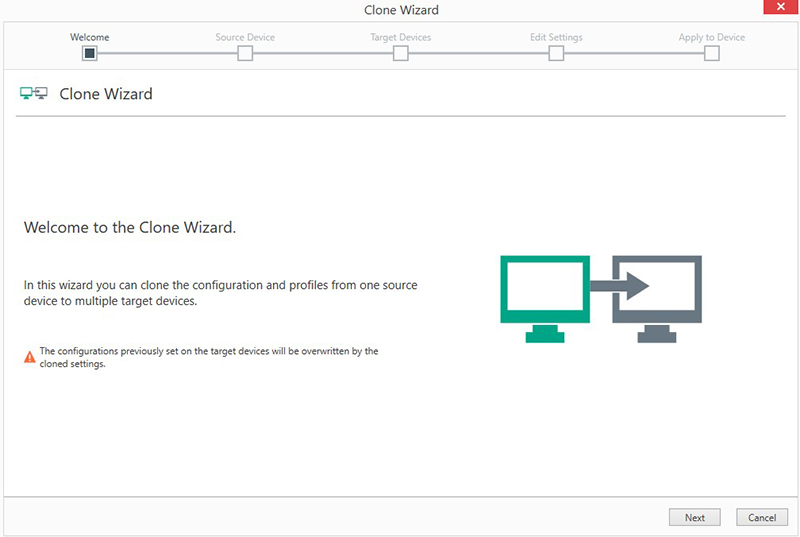
The Clone Wizard enables all specific settings to be copied to other thin clients.
VisuNet Control Center also offers a Capture Image Wizard, which can be used to create a full Windows® image either as individual backup for a specific device or as generic Windows image for thin client units with the same hardware. While the Clone Wizard discussed above copies RM Shell-specific settings, the Capture Image Wizard creates a full backup of the Windows operating system and all settings used therein. Often, users may wish to have a complete Windows image stored on their network for the times when a full factory reset is required. You can use this wizard to easily save and deploy these images as necessary.

Capture Image Wizard enables full backup of the Windows operating system and all settings.
Wizards also exist for other basic features such as uploading and downloading settings and restarting or shutting down specific units.
The last feature we would like to introduce is an extra layer of security in the form of user groups. You can easily create user-specific groups for each member of your team who will be using VisuNet Control Center. Each user will have their own login and set of privileges that allow them to perform certain tasks within the software. Want a user to have “view-only” rights? No problem. Want a user to be able to do everything except edit user privileges and update the firmware? No problem. VisuNet Control Center uses local passwords and supports active directory users for those who wish to implement user login in this way.
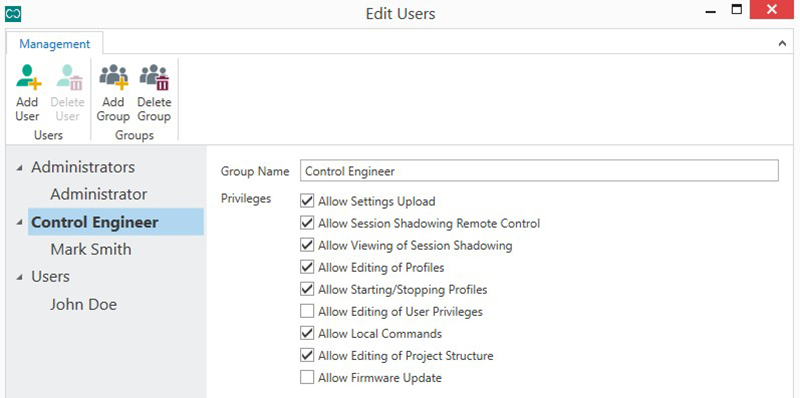
With the VisuNet Control Center, user-specific groups can easily be created and corresponding authorizations granted.
These are just a few of the main highlights of VisuNet Control Center, and the tool is constantly being updated and added to. Whether you use it to remotely configure your thin clients or to interface with HMI operators in clean rooms or hazardous areas, it makes managing and maintaining your installation more efficient. Centralized Management of VisuNet Remote Monitors and Box Thin Clients.
More Information
Subscribe to our newsletter and receive regular news and interesting facts from the world of automation.